Review: Shoot / Neewer RS-60E3 Timer Remote Release
The RS-60E3 Timer Release ($19) struck me as a good option when I started getting interested in shooting time-lapse sequences recently. Canon makes the TC-80N3 timer release for the 7D and 5D Mark II, at a price of about $138. However, many people prefer to use a less expensive body for such shutter-actuation intensive work, and unfortunately, Canon does not make a similar accessory for the 60D or Rebel series. Luckily, our industrious friends in China have picked up the slack. Like so many other cheap electronic products coming out of China today, the branding and model designation of this timer is not consistent: it is sold under the brands Neewer, Shoot, GTMax, Opteka, and is sometimes even marked as JVC, though regardless of branding, it costs less than 20% of the price of a similar Canon release.
But the question remains: will this thing work? So far, the answer appears to be a solid YES, if you shoot with a Canon 60D, Rebel T3i, or T2i.
In the Hand
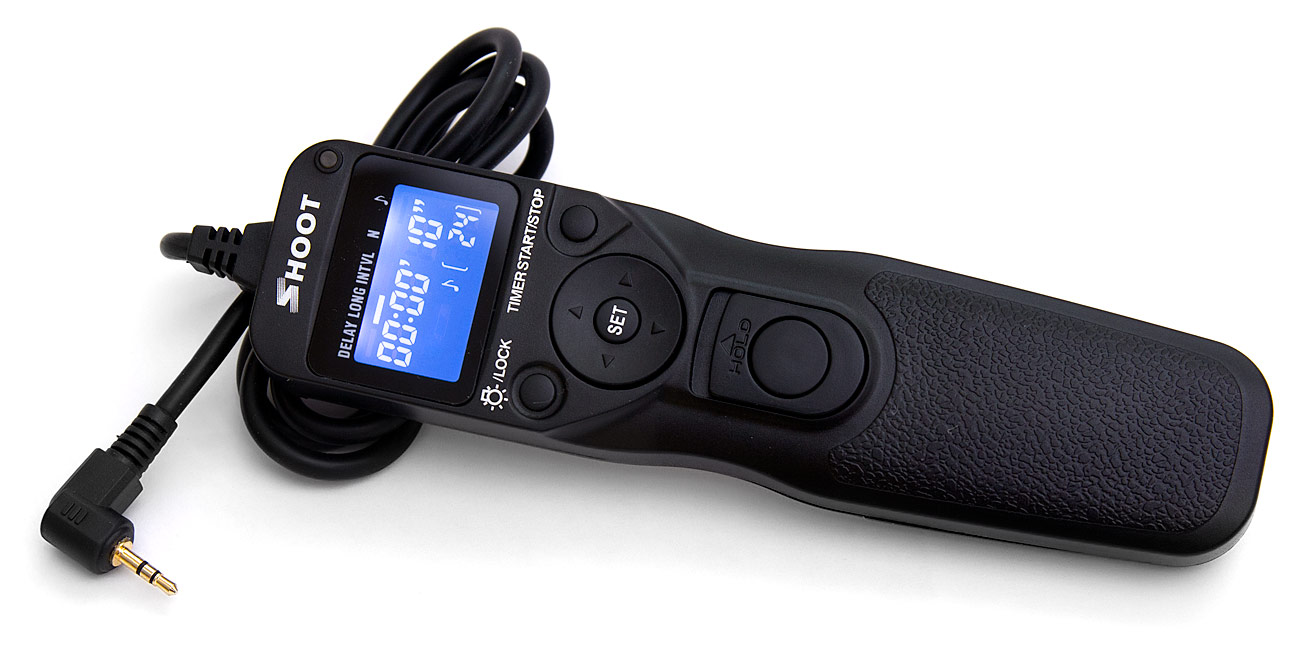
The construction of the RS-60E3 feels fine, but not great. It is solid, but not rugged. There is no rubberized grip material on the body, and the plastic does not lend the feel of a Pelican Case that will stand up to anything (short of bear attack). On the occasions when I’ve dropped it on carpeted concrete, the battery cover has flown off and hidden under chairs or shimmied into crevices, but the device itself has held up just fine. Judicious application of gaffer tape will help.
The buttons are also just fine. They don’t feel like a luxury product, but they certainly feel like they work smoothly and reliably.
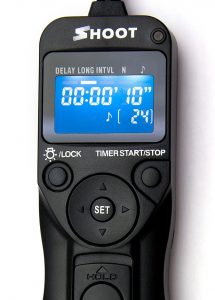
The LCD readout it a little odd. Instead of the typical dark characters on a lighter background, this LCD reverses things. In full daylight it’s still easy enough to read, but lacks contrast. In dimmer light, it’s almost impossible to read unless you illuminate the screen, which appears to be what they intended. When illuminated the screen is easy to read, though a little unevenly illuminated at the top.
Functional Design

With a product like this, the design of the controls is very important. In the service of reducing costs, it would be very easy to create something that is a hassle to operate. Luckily, that is not the case here.
To test how intuitive the controls are, I opened the box, inserted the batteries (2 AAA), and tried to take a series of time lapse photos, without looking at the instruction manual. I was pleased to discover that it was very simple. I played around with the controls for about 3 minutes before I was satisfied that I knew how everything functioned.
This is how it works.
There are 5 settings, each listed across the top of the screen, with a bar in the LCD panel beneath the label indicating which is selected.
- Delay: Controls how long the timer will wait before starting the shooting sequence. So, if you want to take a photo of the moonrise but don’t want to wait up until 3 AM, you can set the timer to start shooting X hours:minutes:seconds in the future.
- Long: If you’re shooting in BULB mode, this controls how long the shutter will be held open. A great feature for anyone shooting the night sky, or at night in general. This will be left at 00:00:00 for standard daylight shooting, or non-bulb mode, I suspect.
- Interval: The duration between shots.
- Number: The number of shots that will be taken in the series. Perhaps the biggest drawback of this timer is that the highest setting is 399. While this would produce over 16 seconds of video at 24fps, it seems like a needless limitation.
- ♪ : The eighth note indicates whether the beeps are turned on or off.
To change the settings, you simply move the indicator bar so that it’s under the appropriate label (using the navigation pad), and press “SET”, at which point you can navigate to the hours, minutes, or seconds settings, and press up or down on the pad to increase or decrease the value. The Timer Start/Stop button controls the programmed sequence, while the shutter-release button (below the navigator pad) simply operates like a standard cable release, independent of the timer.
Additionally, if you turn the ♪ beep on, then when you use hold down the shutter release button for a bulb exposure, it gives you an audible count of full seconds, which is handy.
In Use
So far, I’ve only shot 3 or 4 sequences of photos, ranging from 2 – 20 minutes in duration, and I’ve encountered no problems. The timer has worked as expected.
This is a roughly 20 minute sequence shot from my back patio at sunset. Shots were 10 seconds apart, re-played at 24 frames per second. It’s only a few seconds long, and worth switching to HD.
Next time, I might try shooting frames 5 seconds apart, but that’s not the timer’s fault.
Concluding Thoughts
I was pleased to discover that this timer is powered by AAA batteries. Many photographic devices these days are powered by unusually sized batteries, like CR-123A or even “button” batteries, which can be difficult to find while traveling in remote areas, and rechargeables are even harder (or impossible) to find.
More expensive timers do exist for the 60D and Rebel Series. Some of them are wireless, which I don’t recommend; there are too many things that can interfere with a wireless signal that will ruin a long time-lapse sequence. Wired versions also exist, like the Satechi, which costs roughly twice as much as the Shoot. Unfortunately, it has the same 399 shot limitation, which has been my only reservation with the RS-60E3, so I don’t see any particular advantage to spending the extra money.
All things considered, then, I’d recommend the Shoot RS-60E3 to anyone who is getting started with time-lapse photography / video or anyone who uses BULB mode on their compatible SLR.


