I first encountered Drobo products eight or nine years ago, and was impressed enough to write a bit about them on this site, but some concerns cropped up, and after a couple years, they disappeared from my radar, and I mostly forgot about them.
But recently, Drobo has popped up again, under new ownership. I met with their reps at PhotoPlus last fall and spent some time checking out their impressive new product line. In addition to network attached storage, they have USB-attached drive arrays and blazing fast Thunderbolt-attached drive arrays… ostensibly fast enough to be used while editing video.
Are they any good? Are they going to leave you high and dry? Are there better options? Let’s see.1Drobo sent me this model for free to provide an honest review. I never accept goods in exchange for a positive review. Always take everything that you read on the internet with a grain of salt, though.
Ease of Use
There’s no shortage of Network Attached Storage (NAS) devices on the market, but for many people, they can be excessively complicated to set up, configure and use. The Drobo B810n is more expensive than some of the other options, but offers what few others can: simplicity along with a full list of features.
Device Setup
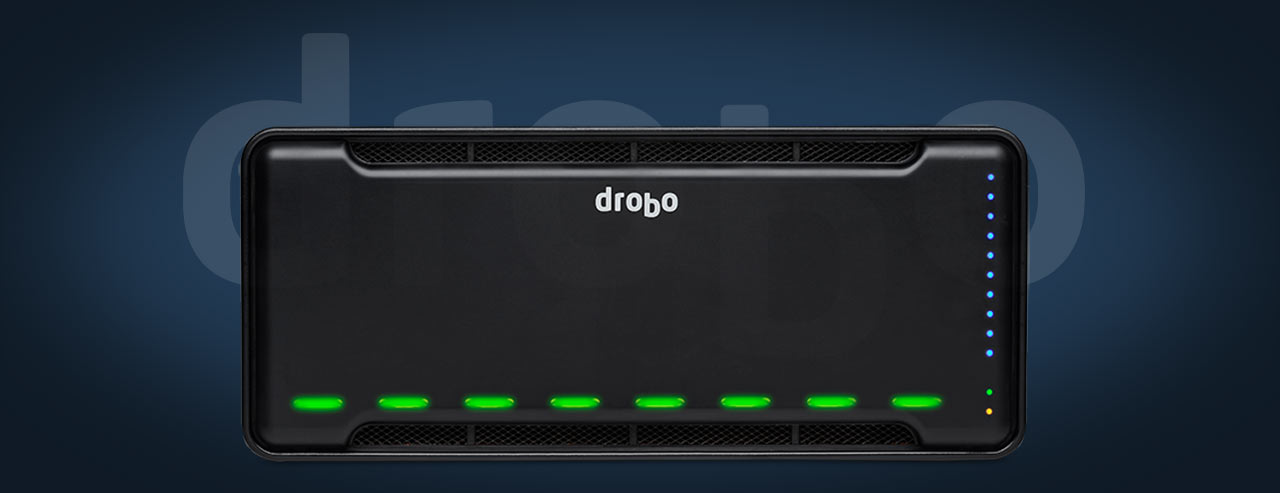
The hardware setup of the Drobo B810n is childishly easy. You slide a couple of hard-drives into the slots in the front (no screwdriver required!). You plug the power cord into the wall. You connect an ethernet cable from the Drobo to your network. That’s it.
To add more hard drives, you don’t even have to turn it off (ie, it’s hot-swap). You can just slide them right in to empty bays. The front panel is just held on with a ring of magnets.
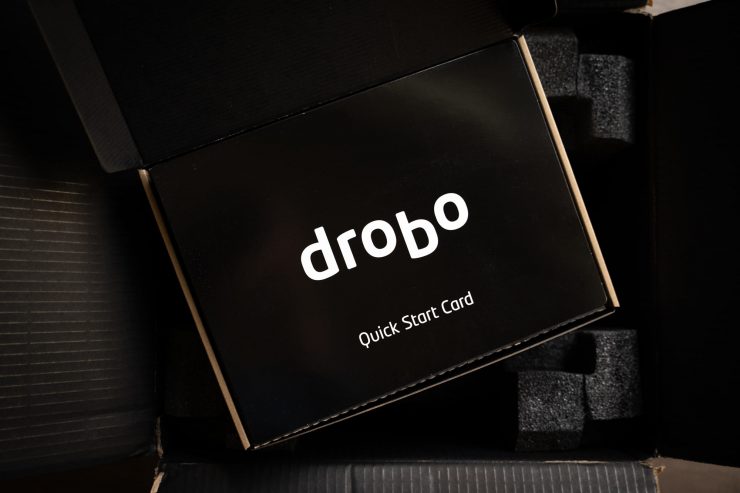
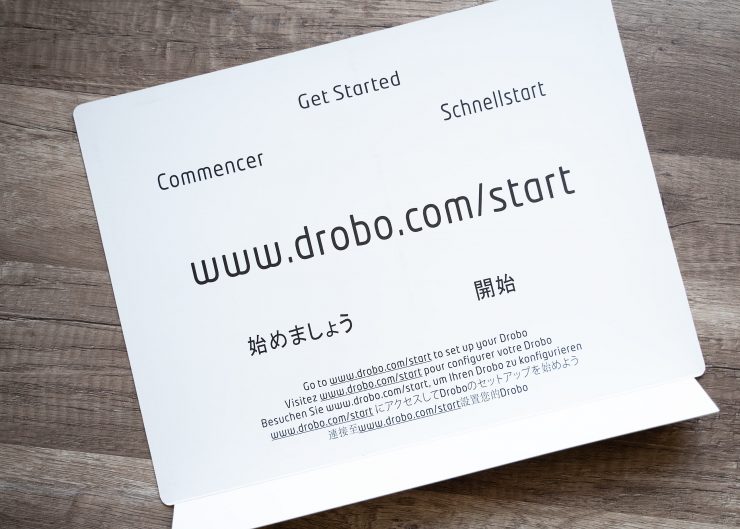
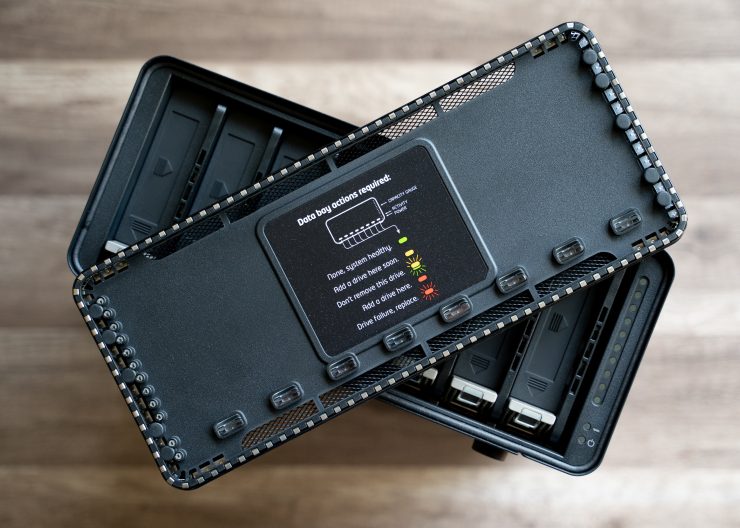
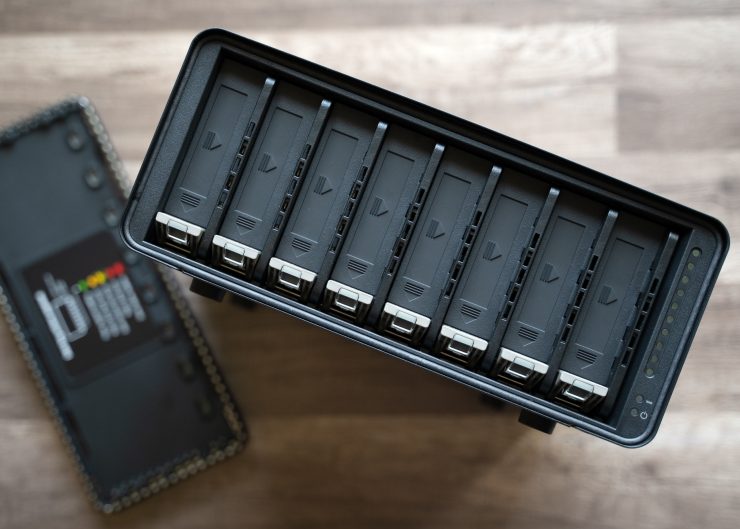
Upon opening the Drobo Box, you’ll see “Drobo Quick Start Card” in large, friendly letters. Upon flipping the card over, you may be disappointed to discover that it doesn’t contain quick and simple instructions, it contains a web address to get more info. But fine: that gives them the opportunity to keep the instructions perfect and up to date for each individual model, right?
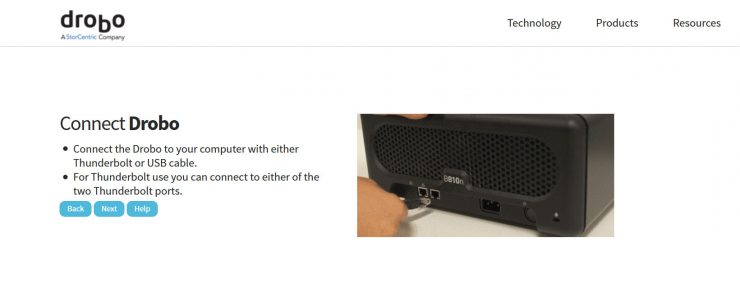
So it did not inspire confidence when I followed the link to the guide and quickly encountered the instruction to connect the Drobo to my computer with a Thunderbolt or USB cable (next to a GIF of someone doing neither one of those things). Of course, I knew that this was a simple mistake copied over from a different product and attached the device with an ethernet cable, but I could easily understand a less technically minded person getting tripped up here; this is not a great start for a company for which customer service and ease-of-use are their raison d’être.
However, the rest of the instructions were quick and simple, and in a matter of moments the Drobo was all hooked up and turned-on and churning away at some invisible task.
I had started off by installing two 8TB hard drives, but quickly added two more to meet the capacity of the photo archive I wanted to backup, This was seamless; as I slid in each drive they were automatically recognized by the Drobo and put to to work.
Computer Setup
Once the Drobo is connected to your network, you’ll download the Drobo app (called the Drobo Dashboard) and install it on your computer. The software will automatically detect the Drobo on your network, and you click on a dashboard icon to initialize the device.
The only thing left to do is set up “shares” on the Drobo, which are essentially folders that can have separate permissions. I clicked on the “Mount” checkbox and mounted my default “Public” share to be the “P:” drive on my computer (but used E: on my Surface), and from there, the Drobo was available to me just as if it were a hard drive on my computer.
This process couldn’t have been much easier.
For Multiple Computers
I decided to get the Drobo B810n rather than the Thunderbolt version (which attaches directly to a single computer) because we work with multiple computers, and I wanted to be able to access the files on the Drobo from all of them.
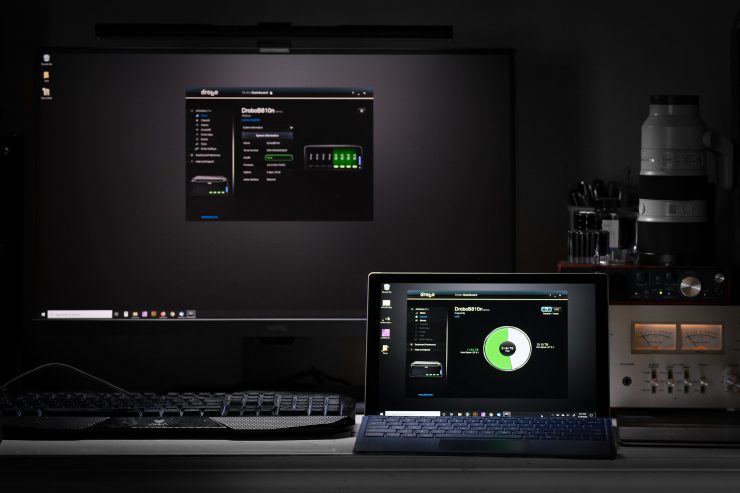
To use it from multiple computers, all you have to do is install the Drobo app on each computer that’s on the network. Again, the Drobo will automatically be detected, and you’ll be able to mount the Drobo from the app as a drive on each machine.
This makes it easy to come home from a photo shoot or trip with my laptop or Surface, transfer my images directly to the Drobo, and then access them from my Workstation at my desk. Very handy and efficient.
Data Safety
Drobos are designed for data redundancy using BeyondRAID so that if any one of your drives fail, the data is still safe: you can add a replacement drive back into the Drobo and recover all of your data.
When two drives are in the Drobo, this simply means that one of the drives is a direct backup of the other (similar to RAID 1). When three or more drives are used, though, the Drobo distributes data across all of the drives, with redundancy (similar to RAID 5).
To keep things simple, this means that if you install two 8TB drives in the Drobo, you’ll get only 8TB of storage space, total, losing one of the whole drives for backup space. If you add three 8TB drives, though, you’ll get 16TB, and if you add four 8TB drives, you’ll get 24TB, etc. If your drives are different sizes, It will always be the largest drive that will be lost to data redundancy (so if you have 8, 6, 4, and 2TB drives, you’ll effectively get 12TB of storage space).
Furthermore, you can initialize “Dual Disc Redundancy” (similar to RAID 6), which will protect your computer against the unlikely event of two hard-drives failing at the same time, though at the loss of more storage space. With this option, you’ll lose your two largest drives to redundancy, but this is still a net gain over plain duplication if you’re using 5 or more hard drives in the Drobo.
Drive failure isn’t the only potential problem that can cause data loss. If the Drobo or its RAID controller fails, then things get tricky. Since the data is broken up into blocks and spread across multiple drives, if the Drobo crashes you can’t simply put one of those disks in another computer and read the data from it.
Recovery is possible now, though2It seems that this was not always the case. Since Drobo uses “BeyondRAID” rather than open RAID protocols, it used to be very difficult to recover data from a Drobo that had failed, and this was one of the reasons that I stopped recommending the Drobo several years ago.. With current firmware, you can simply pull your hard drives from your existing Drobo and put them in a second Drobo of the same model (or a newer one), and the data will all automatically be readable. If this contingency crops up, and you have DroboCare (free for two years, subscription after that), they’ll send you a “Migration Kit” that includes a second Drobo to help with this process.
Even if you don’t have DroboCare, there’s now recover software out there that will get the job done. USF Explorer, for example, will allow you to image each drive from your Drobo, mount them virtually in your computer (assuming you have the space), and then recover the data.
None of that is quick and easy, but that’s life when it comes to catastrophic hardware failure (though there’s no reason to think that it would be any more likely in a Drobo than any other NAS).
Still, I don’t expect the Drobo to be foolproof. It’s still ideal to have backups of your data in additional locations (preferably in another building or on the “cloud”, in case of fire). That said, the Drobo should protect your data from the most common data storage threats.
Failure Testing
One of the problems with testing a piece of equipment like the Drobo B810n is that it’s supposed to protect you from hard drive failure, but that only happens (unpredictably) after several years for most hard drives.
I was lucky. While I was searching through my computer graveyard for old drives to throw into this thing, I ran across a couple that had been labeled as “functional but failing”, and one of them, according to Crystal Disk, had over 50,000 hours of use on it. I slid it into an open slot on the Drobo and, after a few moments, got a green light. I transferred some extra data to the Drobo for good measure.
Everything seemed fine for about a day, but the next afternoon, I got a “drive failure” warning from the Drobo Dashboard, and the drive’s light on the Drobo turned red.
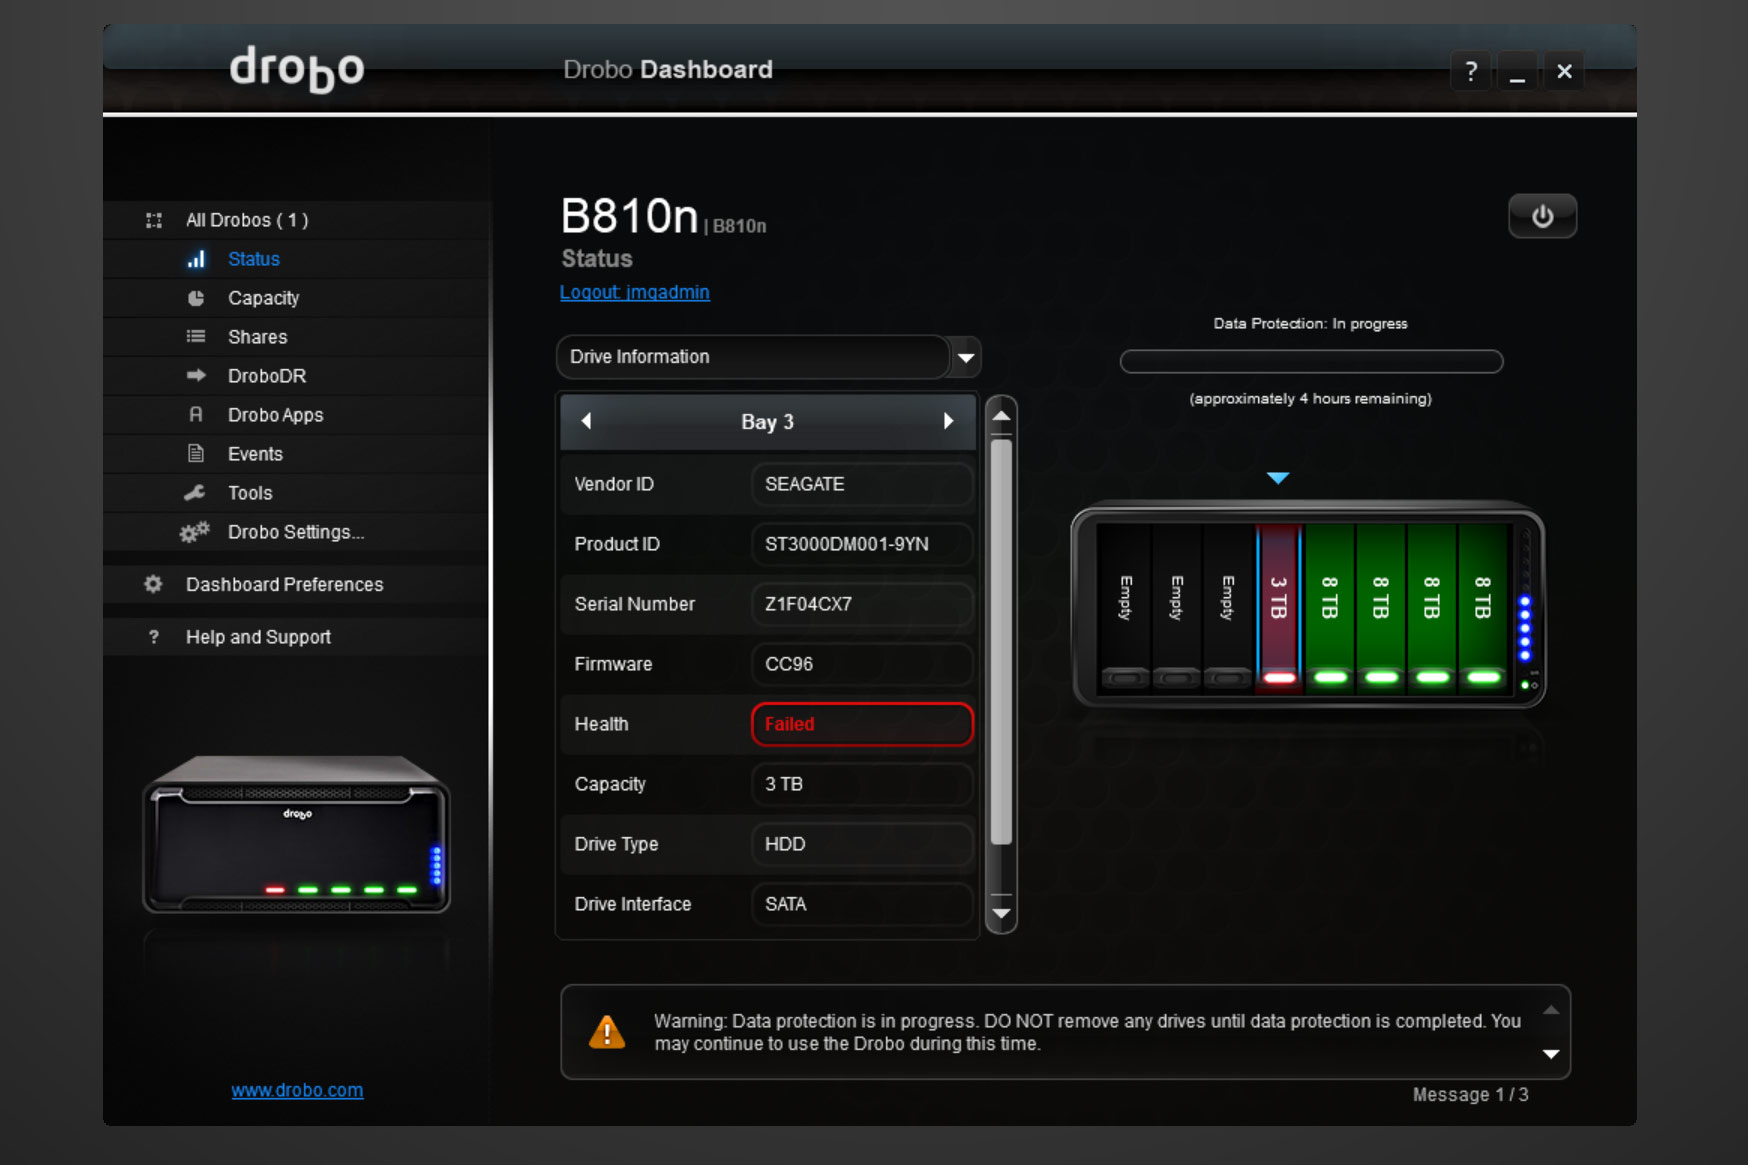
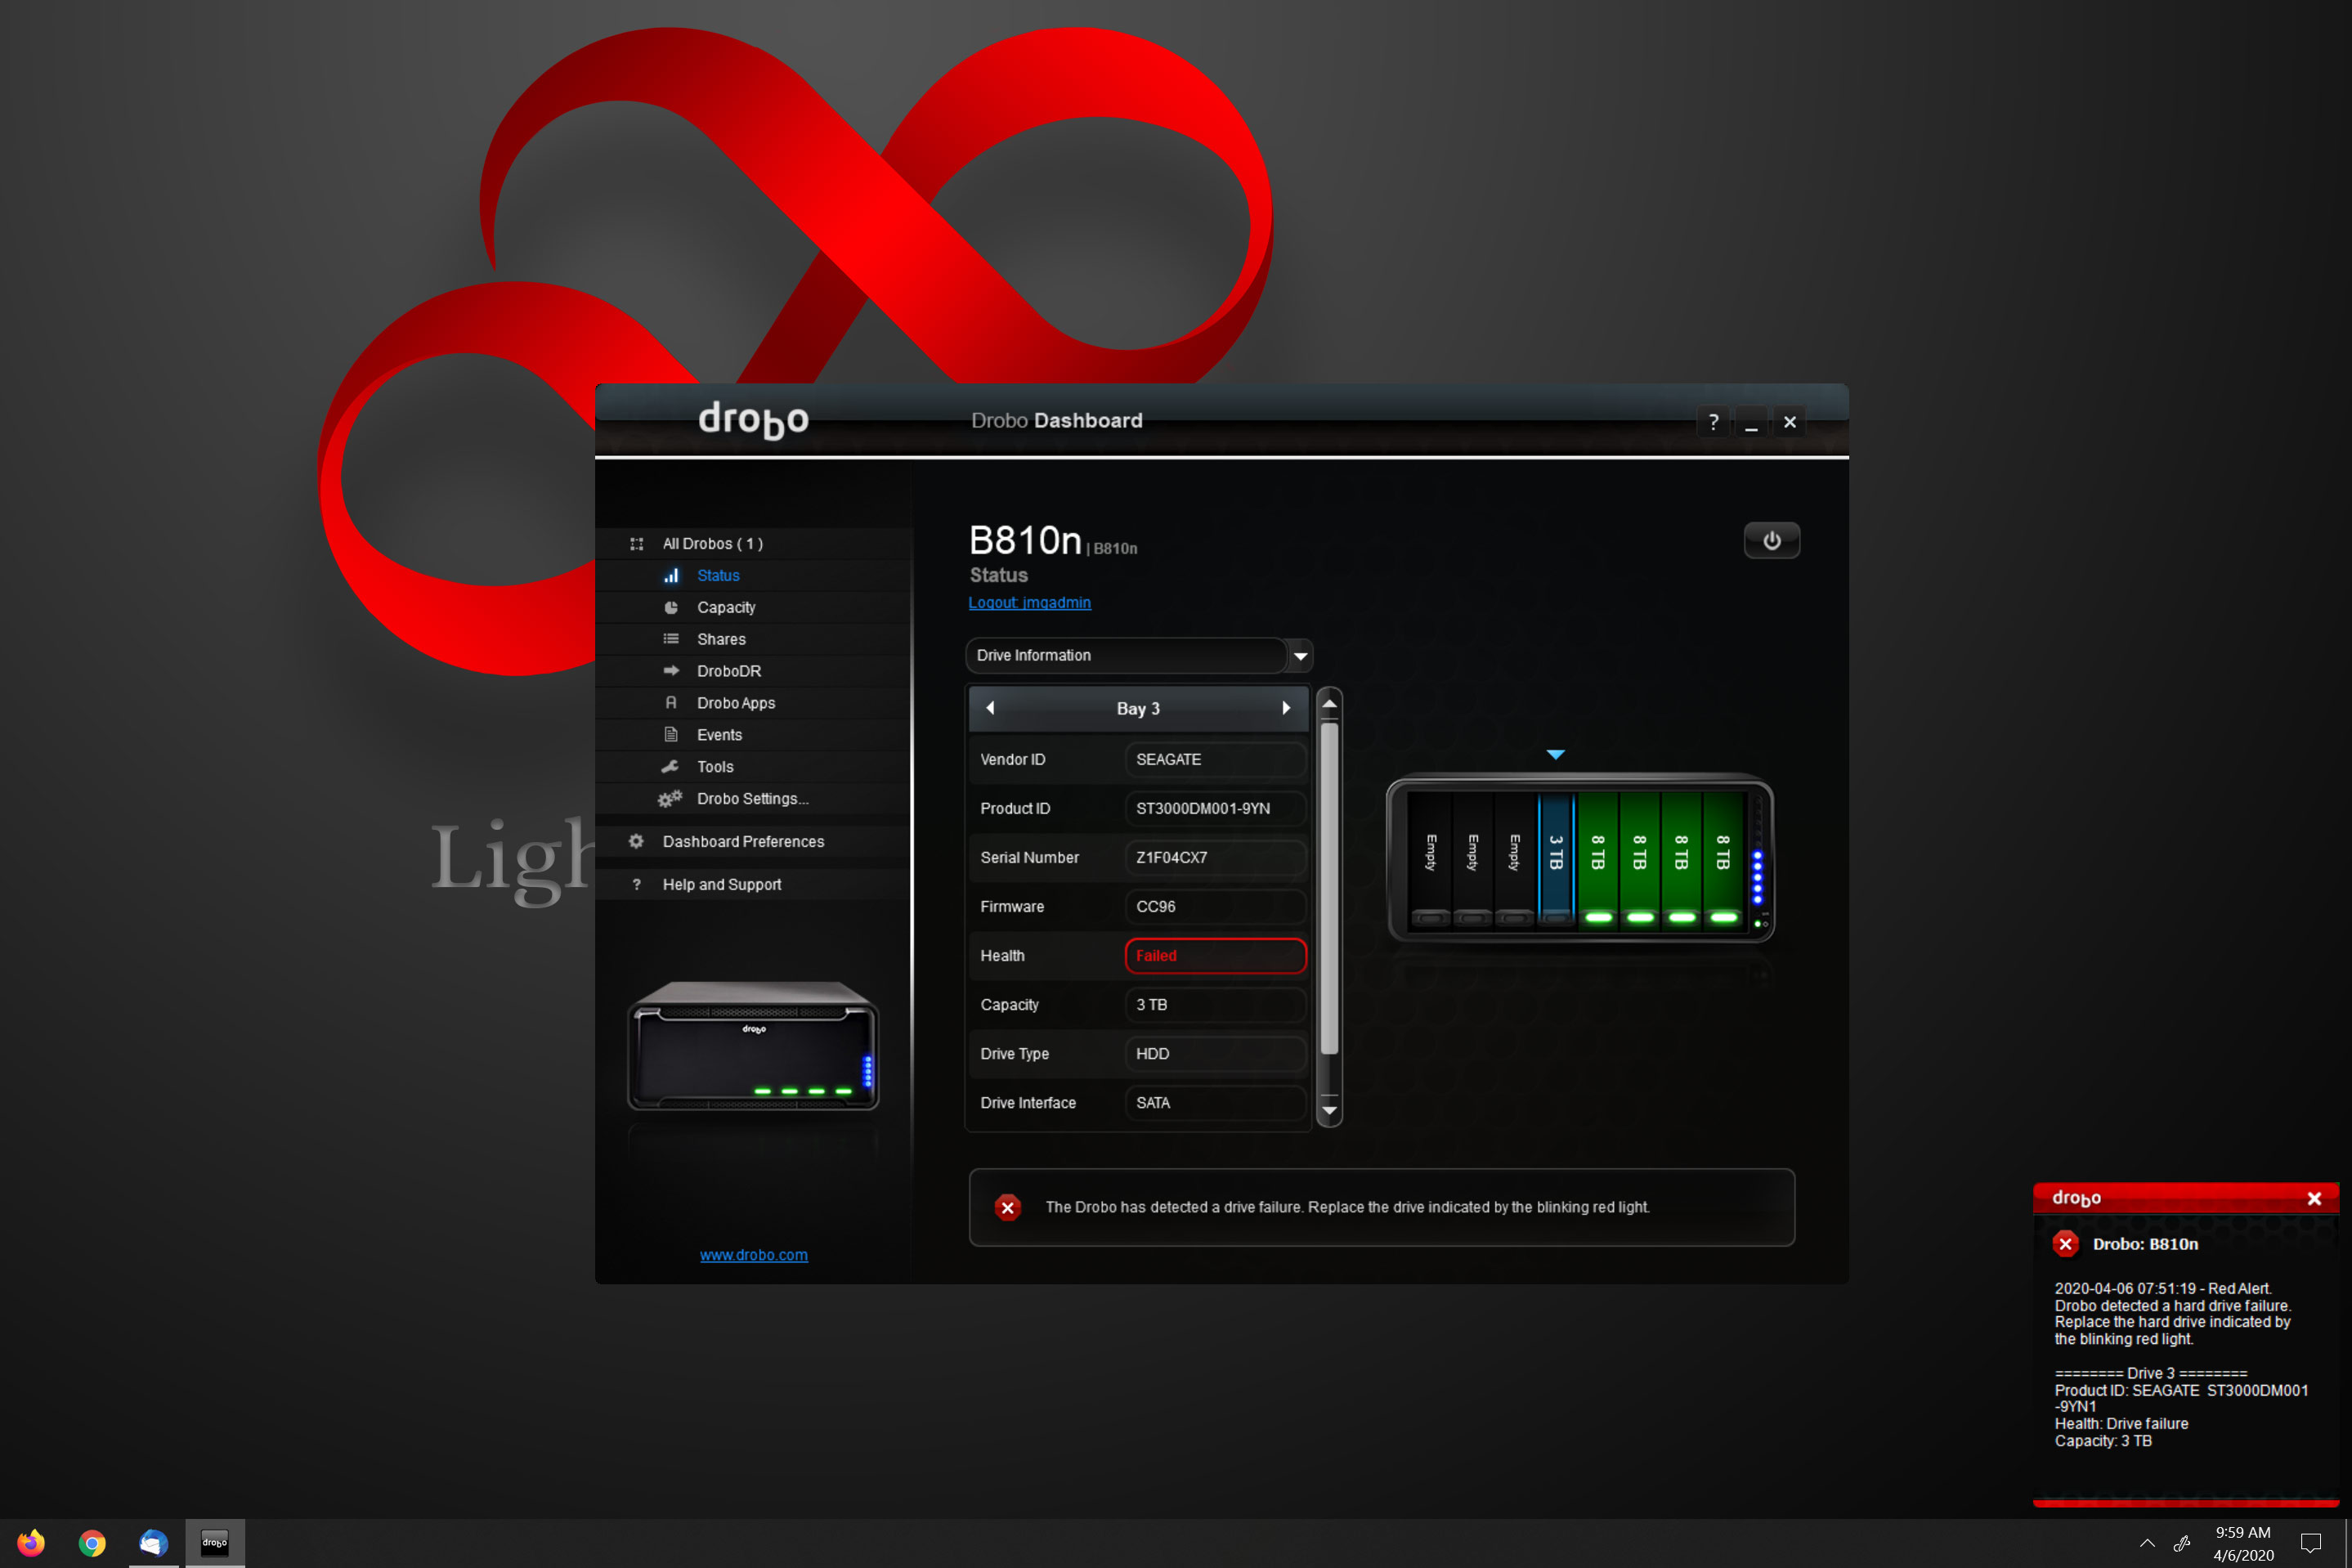
Excellent! This gave me the chance to see if any data had been lost, and how easy it would be to get back on track.
I pulled the bad drive from the Drobo, replaced it with one of a similar size, and waited. The B810n recognized it, and started the data recovery process. For about an hour, the whole Device was unavailable while the machine churned and chattered and lights blinked, and redundant data was copied over to the new drive. When it finished up and the Drobo came back online, and I checked out my files as thoroughly as I could. Everything was back to normal.
The entire process of data recovery when a drive failed was almost entirely automatic, quick, and painless, and in the end I didn’t lose anything. As a photographer, this is what I want: a device that lets me concentrate on my photography, not on computer hardware.
Photo Backup
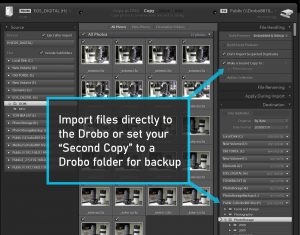
Once your Drobo is up and running, it is essentially an always-on backup system in itself3This is not technically a backup; it’s just data redundancy, but it fulfills pretty much the same purpose. I still recommend saving your images to another location, if you can., so to have your photos backed up, all you have to do is store them on the Drobo.
I find that the easiest thing to do is to import my images to my workstation’s fast SSDs for initial editing, but I use Lightroom/ACR’s “Second Copy” feature on import to ALSO copy the images to the Drobo, and that’s all you really need to do.
If you don’t copy your files to the Drobo on import, you can also use backup software to copy them over to the Drobo. I’ve been using Retrospect 17 for this job, but there are other good options, too.
Extra Features
In addition to connecting to your home or office network, Drobo offers a few different apps so that you can access files from your phone or backup your phone images to the Drobo.
Additionally, there are dozens of apps that can run on the Drobo to do the sort of work that is normally done by a web-server: it can host a WordPress Website or Apache Webserver. You can run entertainment apps like Plex or Twonky to serve your music and movies to your network or the internet, or you can run “own Cloud” to use your Drobo as a giant cloud storage drive.
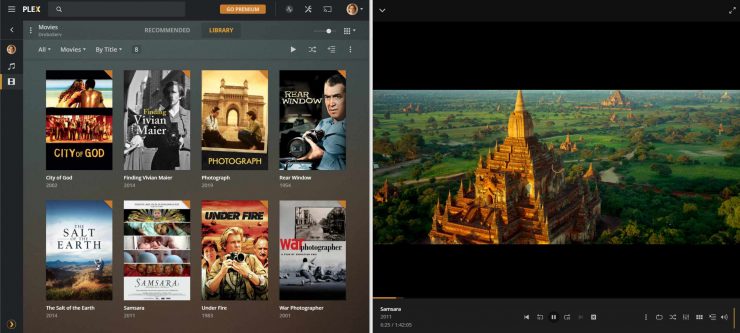
I installed Plex on my Drobo, and added a collection of photography-related movies from our definitive list, just to see how it would work. With the movies moved to the Drobo, the Plex server worked like a charm (no problems with transcoding), allowing me to access my movie collection from anywhere on the network, or anywhere in the world with an internet connection. Handy!
Data Transfer Speed
The Drobo B810n has dual Gigabit ethernet ports and can connect to your network with both of them at once, making its data throughput impressive. Of course, most computers only have a single wired Gigabit connection to a network, but wireless (in ideal conditions) can be faster (801.11 ac can be just shy of 7Gbps).
One Gigabit is equivalent to about 125MB/s, so that is the theoretical limit for a file transfer between a Drobo and my computer (with a 1Gbit network adapter). In practice, I get something closer to 65 – 90MB/s, depending on the size of the files.
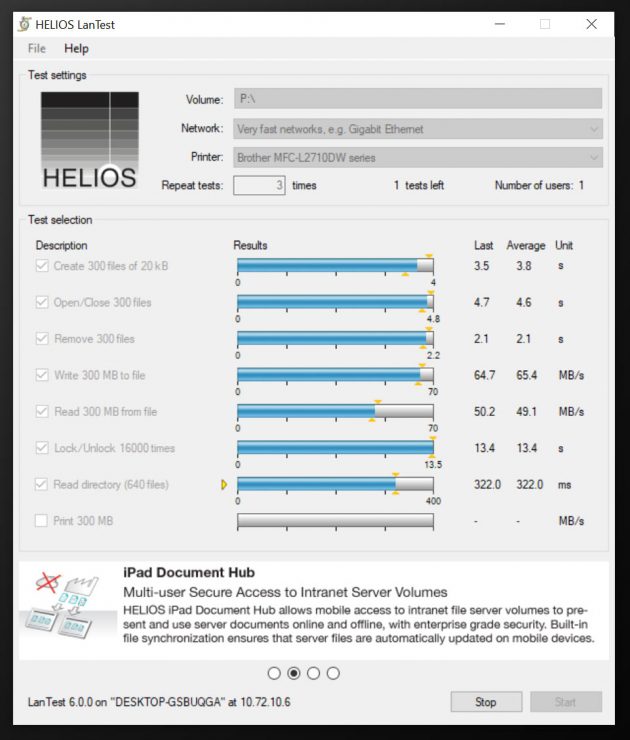
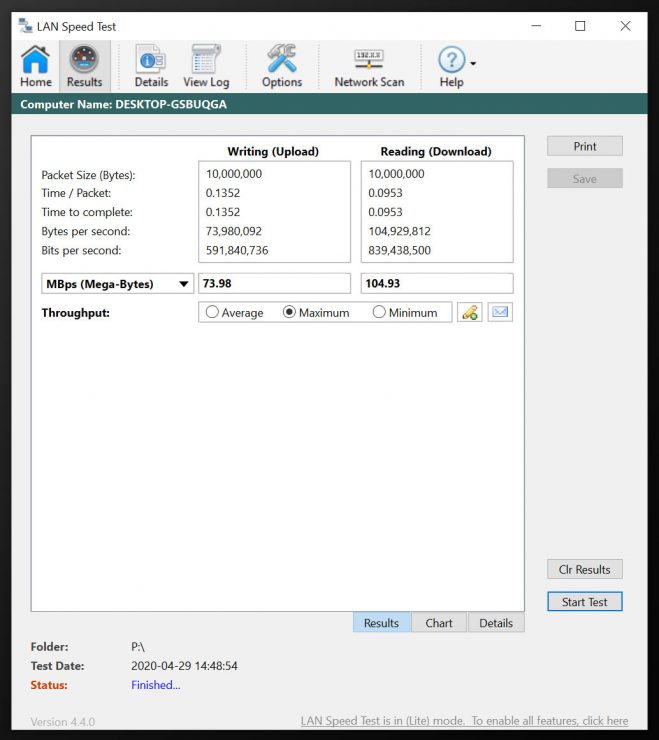
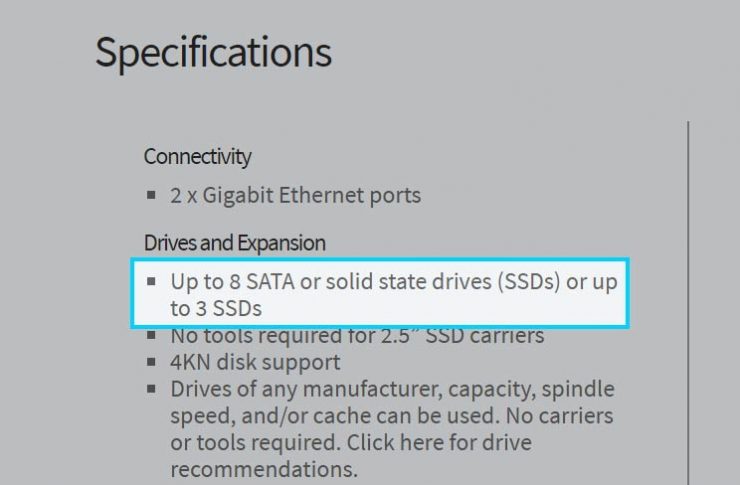
This is plenty fast for archiving work or even for media lookup and playback, but it’s not ideal for a drive to work from directly, especially if you’re using large video files. For that, one of Drobo’s Direct Attached Storage (DAS) devices would be better; they can connect via Thunderbolt 3 (40Gbit = 5000MB) or USB-C (10Gbit), which will dramatically increase data transfer speeds4The hard drives will have read/write speeds that are much slower than that, with a theoretical maximum of 6Gbit, generally, but actual performance is slower. Drobos do support SSDs, though. PCIe 4 NVME drives can transfer at just under 5000MB/s (about 40Gbit)..
Personally, I keep a couple of fast (PCIe 4) 1TB NVME drives in my workstation for workspace while I’m editing video and to store my images from the past few months. When I know I’m ready to archive them, I transfer them to the Drobo and other backup drives.
The Downside
I haven’t run into many “cons” to go along with all of the Drobo “pros”, but it hasn’t been entirely perfect, either. While the Drobo software is quite good, the overall experience sometimes can lack polish. I’ve already mentioned the mistakes I encountered in the setup instructions, and I’ve found similar little glitches when looking at the documentation on the Drobo site (though Drobo has quickly fixed some of them after my feedback). Furthermore, I’ve found that the Drobo does not report its drive space correctly to Windows:
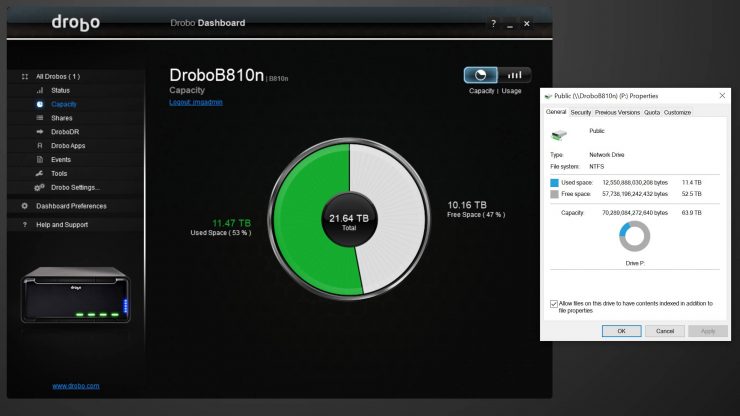
After inquiring about this to Drobo’s tech support, I understand that this is normal behavior and allows the Drobo’s actual storage space to expand or contract within that working space without requiring Windows to make adjustments. I’ll trust Drobo that this is the best option, though I’m not sure what the drawback would be of having Windows adjust the volume size on the rare occasions that drives are added or subtracted.
None of these issues are consequential, but they’re the kind of thing that I’d like to see cleaned up; they do erode confidence.
I use an older Android phone (Android 7… yes, it’s time to upgrade) and found that while the Drobo Access and DroboPix apps installed on it just fine, they were unable to connect to the Drobo. I was able to get them to work with one of my newer Android devices, but compatibility seems to be a slight concern, here. It’s also worth mentioning that the Drobo Access app has a fairly poor rating on the Google Play store for what seems to be similar reasons.
Customer Service
Drobo’s devices are intended to be used by everyone, regardless of skill level, and consequently require solid customer service. I wanted to check it out, but didn’t really have any problems with the Drobo to get help with, and didn’t think I’d have much luck just making something up.
Eventually, I picked a selection of little issues that I had encountered and submitted three support tickets one Friday morning to see how they’d be handled: one was a Windows issue, one was a Drobo App update issue (app running on the Drobo), and one was an Android Drobo App issue.
Overall, I’d say that my customer service experience was fair to middling. I got one response on Saturday, and two more on Monday. One ticket was answered with a link to a tutorial that pretty much answered my question, and the others said either that nothing was wrong or that there was nothing that could be done. I didn’t expect a whole lot out of the issues that I raised, and I didn’t get a whole lot in return. We are all currently in the middle of a Coronavirus outbreak, though, and I’m going to cut them a little slack. I don’t know what their staffing situation is like right now.
Versus Alternatives
The Drobo B810n costs around $1300 at the moment. How does that compare to the alternatives?
The Synology DS1821+ 8 Bay NAS is probably the most well-known competitor, and currently costs $1,036.99. Where the Drobo has two ethernet ports, the Synology NAS has four (upgradable to a 10Gbit ethernet card, though 10Gbit networks are still uncommon).
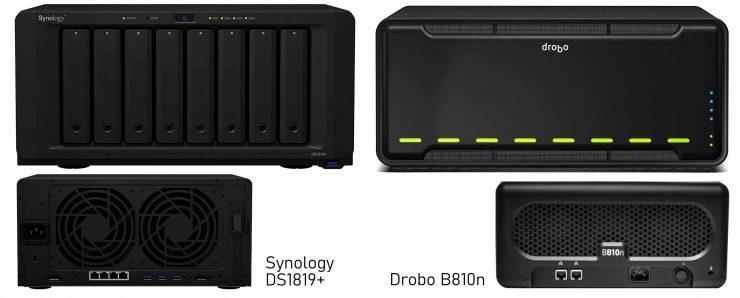
The Drobo has 2GB of RAM, and the Synology has 4GB (upgradable to 32GB). Both devices have a quad-core processor, but the Drobo’s is a Marvell Armada XP MV78460 1.2 GHz CPU, and the Synology’s is a 2.1GHz CPU (about twice as fast).
Like the Drobo, the Synology is capable of a variety of different data redundancy configurations, including offsite backup to a second unit.
However, Synology is not known for their friendly and responsive customer service (to put it mildly). Setup and usage will require solid knowledge of home/office networking. Not a big deal for power-users, but perhaps a bit more daunting for the technically-challenged.
Standard RAID devices like this will require an extra hard drive (a hot-spare), that sits idle in case of drive failure to get similar functionality, which will bring the cost up. The Drobo does not require an extra drive for this purpose.
Conclusion
After using the Drobo B810n for a couple of months, I’ve been very happy with the unit’s performance; it’s very practical for use on a network in a small office (of photographers) or at home. The unit is well built and feature rich, and its simplicity of use doesn’t bog you down with technical concerns. If you run into problems with it, tech support seems to be adequate or better, and it will keep your data much safer than storage on any single hard drive.
Drobos are somewhat expensive, and if you’re technically minded, you’ll probably get equally good performance (or better) from other popular NAS brands, such as the Synology mentioned above, at lower cost. Whether the Drobo’s simplicity of use is worth the extra cost will have to be up to your own personal preference.
UPDATE (July 20, 2022): As reports have appeared today that Drobo has filed for Chapter 11 Bankruptcy and their future is uncertain, I thought that I’d take a few moments to comment on the performance of my Drobo over the past two years or so.
To this point, I’ve still not encountered any significant problems with the Drobo. The biggest issue that I’ve had was more of an annoyance than anything; in November of 2021 I bought a new 8TB hard drive and added it to the Drobo, and that process was quick and easy. But a few months later, in February, the Drobo reported that the drive had failed. No data was lost, but it seemed like a false positive, and I’ve used the drive installed in my PC tower ever since with no problems.
Otherwise, the Drobo is still doing its job.
