For digital photographers, data backup is critical. In fact, attention to the storage of our photos has never been more important. Fifteen years ago, if our black and white negatives were properly washed, we could slip them into archival sleeves, stash them away in a box, and be confident that they’d still be around if we needed them in 100 years (the outlook wasn’t quite so rosy for color). Digital storage, though, is a different story. Most of us archive images on our hard drives (I have terabytes of files… optical discs just aren’t an option), but hard drives are like any other mechanical devices: it’s not a question of whether they will fail, it’s a question of when. If I had a hard drive crash, I would lose years worth of work and incalculable residual income and trust from my clients, not to mention all of those memories of my friends and family. I can barely stand to think about it.
Luckily, backup these days is cheap and relatively simple, depending on your needs.
Cheap and Simple
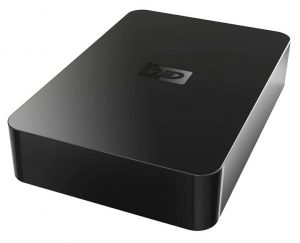
If nothing else, you can buy an additional hard drive for your computer, attach it, and use a backup program to copy your important files onto it. An internal SATA hard drive only costs about $60 for 1TB (roughly 1000 Gigabytes), and even 2TB drives are under $100. External hard drives are usually considered safer for your valuable data, as they keep your drive away from the heat of your CPU and case, and heat is one of the major contributors to hard drive failure. But don’t worry: even 2TB external drives cost under $100.
Again, depending on your needs, the backup software can be expensive, or absolutely free. Cobian Backup, for example, is a free backup program that allows you to specify which directories you want to backup (ie, C:/photos/ ) and where you want them to be stored (D:/photo-backups, for example), and it will automatically copy any new files from the former drive to the latter on a specified schedule. Of course, there is some potential for data loss between scheduled backups, but depending on how much work you do each day, the risk is minimal. More expensive programs, such as Acronis True Image, will monitor your workspace drive continuously and copy new data to your second hard drive immediately, which minimizes risk of loss, but also takes a slight toll on your computer’s performance.
Better yet, if you have the space in your computer and a motherboard (or expansion card) that supports it, you can set up a RAID1 array inside your computer. To go this route, you’ll buy two identical hard drives and attach them to your motherboard’s RAID ports, and configure them as RAID1 (consult your manual). In a RAID1 array, your first hard drive is mirrored exactly on the second, so if either drive fails, you’ll still have the data safe on the other. If you’re interested in using more drives, there are additional RAID modes that may provide better performance as well, but that is beyond the scope of this article.
High Capacity, High Performance
Network attached storage (NAS) devices have increased dramatically in popularity and dropped substantially in price. The idea is simple: instead of installing a hard drive on your computer, you attach a separate storage device to your network, and simply use it as you would any other drive on your computer. Standard, wired networks these days typically use 1Gbit network adapters, making the transfer rates twice as fast as is available with USB 2.0, and even wireless (802.11 N) networks offer speeds of 600Mbit/sec. (as opposed to the 480 of USB 2.0).
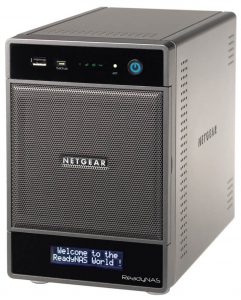
More importantly, though, NAS devices can:
- hold any number of additional drives to meet your storage needs.
- be set up as RAID arrays to protect against data loss from drive failure. Your data on the NAS is always safe, so there is no need for scheduled backups.
- be accessed from multiple computers at the same time, which is important if you use a laptop and a desktop computer, or want to share the storage with family or colleagues.
- usually be configured for internet access, so you can access your files no matter where you are.
In fact, NAS devices can offer dozens of additional features, depending on which model you buy. There are hundreds of makes and models, but many of the most popular models come from brands that we already know and trust, like D-Link, Netgear, LaCie, and Iomega. At the low end of the price scale, the D-Link DNS-323 holds two drives and costs around $170, plus the cost of drives ($60 each for 1TB). Keep in mind that if you set up as RAID1 (and it’s a good idea with only 2 drives), you’ll get 1TB of storage space if you install two 1TB drives because the second drive mirrors the first. Similar two-drive models include the NETGEAR ReadyNAS Duo, the Patriot Valkyrie Dual Bay(least expensive) and the Synology DiskStation DS211j (highest rated).
If you think you’ll need more storage space or more sophisticated features, the options are practically limitless. NAS enclosures suitable for professional photographers and small businesses start at around $300, such as the Netgear ReadyNAS NV+. However, most professionals find that for a more full featured, reliable, and easy to use solution, slightly more expensive models are preferable. The Synology DiskStation DS410 ($533) and DiskStation 411j ($396), for example, are two of the best selling and highest rated enclosures in this class, as is the QNAP TS-410 ($430).
Easy and Flexible
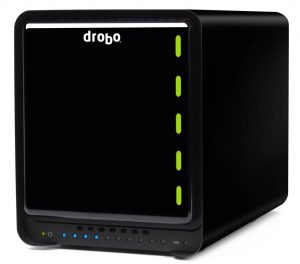
Though similar in many ways to NAS, the Drobo line of products offer plug-and-play ease of use, require no configuration, and are easily expandable, even while powered-on and in use. They use a data-redundancy system that offers protection similar to redundant RAID systems, but it doesn’t require drives of the same size. However, most Drobos are not network devices; they plug into a single computer. If you want to share your data on a network, the Drobo FS line is also available.
The Drobo’s primary advantages come in the “ease of use” category; when it comes to performance, their transfer speeds are generally a bit slower than well optimized NAS systems, though not so much as to have any practical bearing for most applications.
Off-Site Storage
As long as I’m discussing storage, I’d be remiss if I didn’t mention online backup. There are several major providers, including BackBlaze, Mozy, and Carbonite. The major advantage of services like these is that your data is safe even if your house is burgled and computers are stolen, or if your computer is lost in a fire. These aren’t exactly inevitable events in the same way that hard drive failure is, but they do happen. Most of these services provide unlimited storage space, which is great for photographers who work with large amounts of data.
On the other hand, they have some major disadvantages. Of course, there is the issue of ongoing cost, but it’s not terrible compared to the price of storage hardware. More important is the speed of access. On an average day while I’m out shooting landscape work in the field, I’ll fill two to three 4GB CF cards. I have a pretty standard high speed cable internet connection at home which gives me great download speeds, but uploading files is still quite slow in comparison. I recently uploaded a 1GB video file to Vimeo, and the process took over 4 hours. The math is simple. If I were to try to upload my work on a daily basis, I’d have more work to upload before the previous day’s work was halfway uploaded. But of course, the real issue is the thousands of GBs of photos that I already have archived on my computer. And, of course, if a wedding client walks in and says that she wants to buy a DVD of the high resolution files from her wedding two years ago, then it’s going to take me hours just to download them.
If you have a business-class internet connection, work or live at a university with fast internet access, or otherwise have access to an extremely fast internet connection this may be more practical for you, especially if you’re just getting started in photography. For someone like myself it’s simply not an option as a primary archive method, though it might work as a secondary archive for my best work.
A Few Words About File Formats
A friend of mine recently directed me to an article by a well known internet photography pundit, which made some abhorrent claims… but the most outrageous is that everyone should archive their digital photos in JPG format. The reasoning was not just that jpgs are smaller, but that RAW files require special converters and will be impossible to open in the future.
Let me simply say that the gentleman is wrong. If you archive in jpg, you’re losing over 90% of your data (8 bit vs 12-bit or more) without even having a hard drive fail. Digital SLRs are more popular today than 35mm film ever was; only a complete breakdown of the fabric of our society is likely to bring about the complete loss of programs that will convert popular raw files.
However, if you’re concerned about saving your pictures as a more accessible format, jpg is not the answer. TIFF is just as legible as JPG without special converters, it uses lossless compression, and supports 16-bit image depth. A better solution, though, is simply to “convert” (it’s more of a wrapper than a converter) your files into Adobe Digital Negative format (DNG), which was designed specifically for the purpose. You can read about DNG format on the Adobe website.

